Git LFS is a Git extension that allows users to save space by storing binary files in a different location. Git LFS stands for (large file storage) and it’s a method for saving space when working with binary files.
We all know that some repositories have audio files, image files or video files which are all examples of binary files. Git does it great job by tracking changesets in test files and any changes you make to binary files are tracked as an additional copy of a file. This means if you have an image with 100 MB
on your repository and if you make any change to it, git will track in new 100 MB
file, which starts to add fast if you have additional changes. Furthermore, these changes get pushed to your remote repo and your remote repo starts to grow in size too. Slowing down the time it takes to clone, push, pull or perform other operations with your repo. With Git LFS your commits will point to a lightweight reference object in place of a binary file and your binaries are stored on a separate LFS server. This saves space because any time you clone this LFS repo or checkout a branch you only pull down the version of the binary file that you need from your LFS server.
Prerequisites
- Installed git
- Created Bitbucket account and repository
Git Command Line
Before we started with the git lfs and cloning an existing Bitbucket repository, let’s have a quick overview of the basic git command line commands. The most commonly used git commands are:
add
Add file contents to the indexbisect
Find the change that introduced a bug by binary searchbranch
List, create, or delete branchescheckout
Checkout and switch to a branchclone
Clone a repository into a new directorycommit
Record changes to the repositorydiff
Show changes between commits, the commit and working trees, etc.fetch
Download objects and refs from another repositorygrep
Print lines matching a patterninit
Create an empty git repository or reinitialize an existing onelog
Show commit logsmerge
Join two or more development historiesmv
Move or rename a file, a directory, or a symlinkpull
Fetch from and merge with another repository or a local branchpush
Update remote refs along with associated objectsrebase
Forward-port local commits to the updated upstream head
Installing Git LFS
In this tutorial, we will use Centos 7 as a host machine to install and work with git lfs. Before we install the git lfs, we need to make sure that git is already installed on your machine. To check this run:
sudo git --version
You should see the output like below:
Output: git version 1.8.3.1
If you don’t see this output, you will have to install git
before you continue with the tutorial.
Next, we will install the epel repo
by using the following command:
sudo yum install epel-release
To install the git-lfs repo, run:
curl -s https://packagecloud.io/install/repositories/github/git-lfs/script.rpm.sh | sudo bash
And finally:
sudo yum install git-lfs
That’s it, we successfully installed git-lfs.
Clone Bitbucket repo with Git LFS
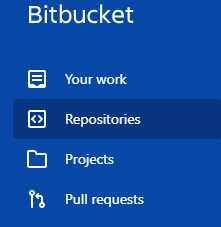
Step 1. Log in to your Bitbucket account, navigate to the Repositories
and open it:
Next, we will clone that repo to our Centos 7 machine.
Step 2. Create a directory project
and navigate to that directory with the following commands:
sudo mkdir ~/project
sudo cd ~/project/
Now you shoudl clone your repository to the local machine:
sudo git clone [email protected]:repo-name/project.git
If you receive the follwoing error:
Permission denied (publickey).
fatal: Could not read from remote repository.
you need to set up SSH keys
and configure it with Bitbucket.
Step 2. From your project directory initialize git lfs
:
sudo git lfs install
Fetch the LFS objects for the current ref from default remote:
sudo git lfs fetch
And now download Git LFS objects for the currently checked out ref:
sudo git lfs pull
Conclusion
In this tutorial, we shown you how to use git lfs
with Bitbucket repository. If you have any further questions feel free to leave a comment bellow.